


როგორ დავაფიქსიროთ ჩემი iPhone Sync ჩარჩენილი ნაბიჯი 2?
თქვენი iPhone-ის iTunes-თან ან Finder-თან სინქრონიზაცია გადამწყვეტია მონაცემთა სარეზერვო ასლის შესაქმნელად, პროგრამული უზრუნველყოფის განახლებისთვის და მედია ფაილების თქვენს iPhone-სა და კომპიუტერს შორის გადასატანად. თუმცა, ბევრი მომხმარებელი აწყდება იმედგაცრუებულ საკითხს, რომ დარჩეს ნაბიჯი 2 სინქრონიზაციის პროცესი. როგორც წესი, ეს ხდება "სარეზერვო ასლის" ფაზაში, სადაც სისტემა უპასუხოდ ხდება ან მკვეთრად შენელდება. ამ პრობლემის მიზეზების გააზრება და შესაბამისი გამოსწორების გამოყენება დაგეხმარებათ თქვენი iPhone-ის გზაზე დაბრუნებაში. ამ სტატიაში ჩვენ განვიხილავთ, თუ რატომ შეიძლება გაჩერდეს თქვენი iPhone სინქრონიზაცია ნაბიჯი 2-ზე და როგორ მოვაგვაროთ ეს პრობლემა.
1. რატომ არის ჩემი iPhone Sync ჩარჩენილი ნაბიჯი 2?
თქვენი iPhone შეიძლება გაიჭედეს სინქრონიზაციის პროცესის მე-2 ეტაპზე რამდენიმე მიზეზის გამო, პირველ რიგში დაკავშირებული დაკავშირებასთან და პროგრამულ საკითხებთან. ცუდმა ან გაუმართავმა USB კავშირმა შეიძლება ხელი შეუშალოს მონაცემთა გადაცემას, რაც გამოიწვევს სინქრონიზაციის შეჩერებას. გარდა ამისა, iTunes-ის ან თქვენი iPhone ოპერაციული სისტემის მოძველებულმა ვერსიებმა შეიძლება გამოიწვიოს თავსებადობის პრობლემები, რაც ხელს უშლის სინქრონიზაციის პროცესს. თუ ჩართული გაქვთ Wi-Fi სინქრონიზაცია, არასტაბილურმა Wi-Fi კავშირმა ასევე შეიძლება ხელი შეუწყოს პრობლემას. თქვენს iPhone-ზე დაზიანებულმა ფაილებმა ან აპებმა შეიძლება ხელი შეუშალოს წარმატებული სარეზერვო ასლის შექმნას და არასაკმარისმა მეხსიერებამ შეიძლება მთლიანად შეაჩეროს სინქრონიზაცია. უფრო მეტიც, მესამე მხარის უსაფრთხოების პროგრამულ უზრუნველყოფას, როგორიცაა ანტივირუსული პროგრამები ან ბუხარი, შეუძლია დაბლოკოს საჭირო მონაცემთა გადაცემა, რაც გამოიწვევს შეფერხებებს. დაბოლოს, iOS-ში არსებულმა სისტემურმა ხარვეზებმა ან შეცდომებმა შეიძლება გამოიწვიოს შემდგომი გართულებები, რაც გამოიწვევს სინქრონიზაციის გაჭედვას მე-2 ნაბიჯზე.
2. როგორ გამოვასწოროთ iPhone Sync ჩარჩენილი ნაბიჯი 2?
ახლა, როდესაც ჩვენ გვესმის, რატომ შეიძლება მოხდეს iPhone-ის სინქრონიზაცია მე-2 საფეხურზე, მოდით გამოვიკვლიოთ ამ პრობლემის გამოსწორების რამდენიმე გზა.
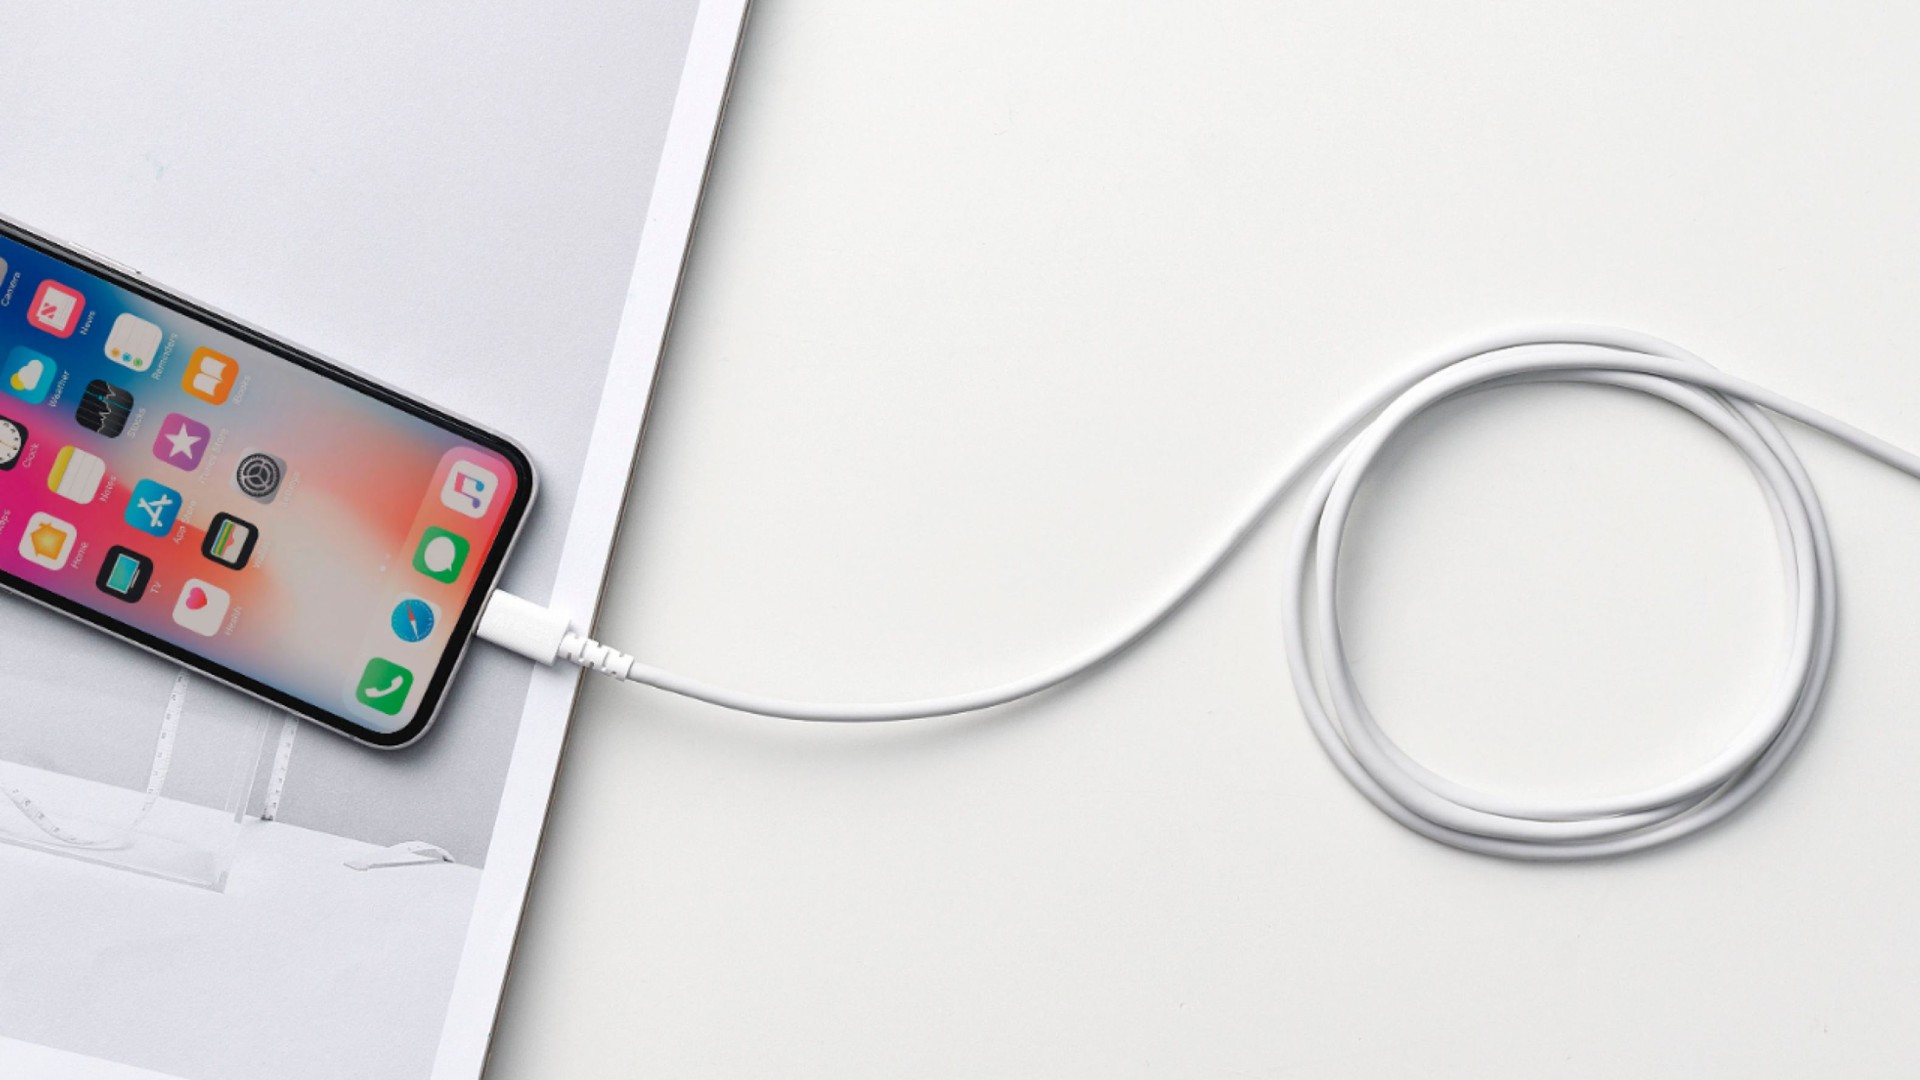
- შეამოწმეთ თქვენი USB კავშირი
დარწმუნდით, რომ თქვენი USB კავშირი უსაფრთხოა Apple-ის სერთიფიცირებული კაბელის გამოყენებით და პირდაპირ თქვენს კომპიუტერში USB პორტთან დაკავშირებით. გაუმართავმა კავშირებმა შეიძლება ხელი შეუშალოს მონაცემთა გადაცემას, რაც იწვევს სინქრონიზაციის გათიშვას; შეცვალეთ კაბელი, თუ ის გაცვეთილია ან დაზიანებულია.
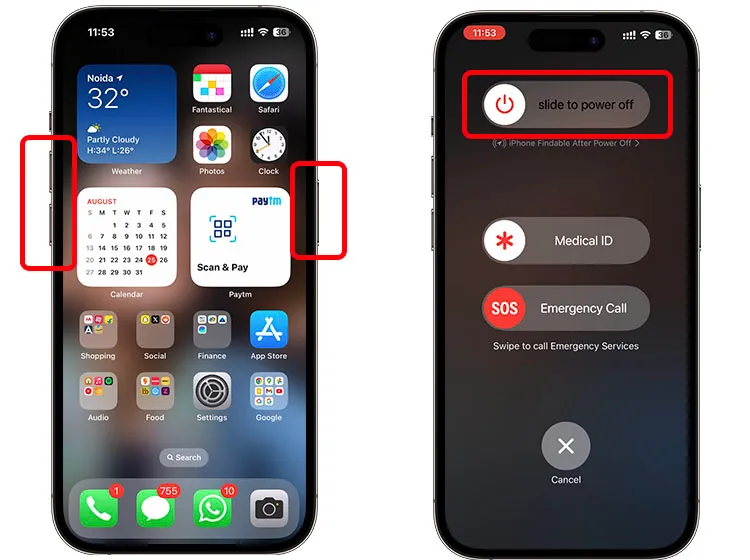
- გადატვირთეთ თქვენი iPhone და კომპიუტერი
გადატვირთეთ თქვენი iPhone და კომპიუტერი დროებითი ხარვეზების აღმოსაფხვრელად, რამაც შეიძლება გამოიწვიოს სინქრონიზაციის პრობლემა. iPhone-ისთვის ხანგრძლივად დააჭირეთ გვერდითა და ხმის ღილაკებს, სანამ დენის სლაიდერი არ გამოჩნდება, შემდეგ გადაიტანეთ იგი მოწყობილობის გამორთვისთვის. რამდენიმე წამის შემდეგ ისევ ჩართეთ იგი.
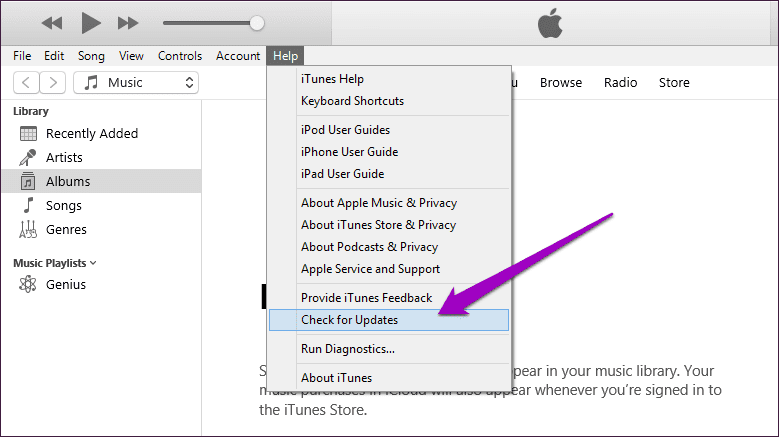
- განაახლეთ iTunes ან Finder და iPhone
დარწმუნდით, რომ თქვენი iPhone და კომპიუტერის პროგრამული უზრუნველყოფა (iTunes ან Finder) განახლებულია. მოძველებულმა პროგრამამ შეიძლება გამოიწვიოს თავსებადობის პრობლემები, რამაც შეიძლება ხელი შეუშალოს სინქრონიზაციის პროცესს. შეამოწმეთ განახლებები ორივე მოწყობილობის პარამეტრებში და დააინსტალირეთ ნებისმიერი ხელმისაწვდომი განახლება.
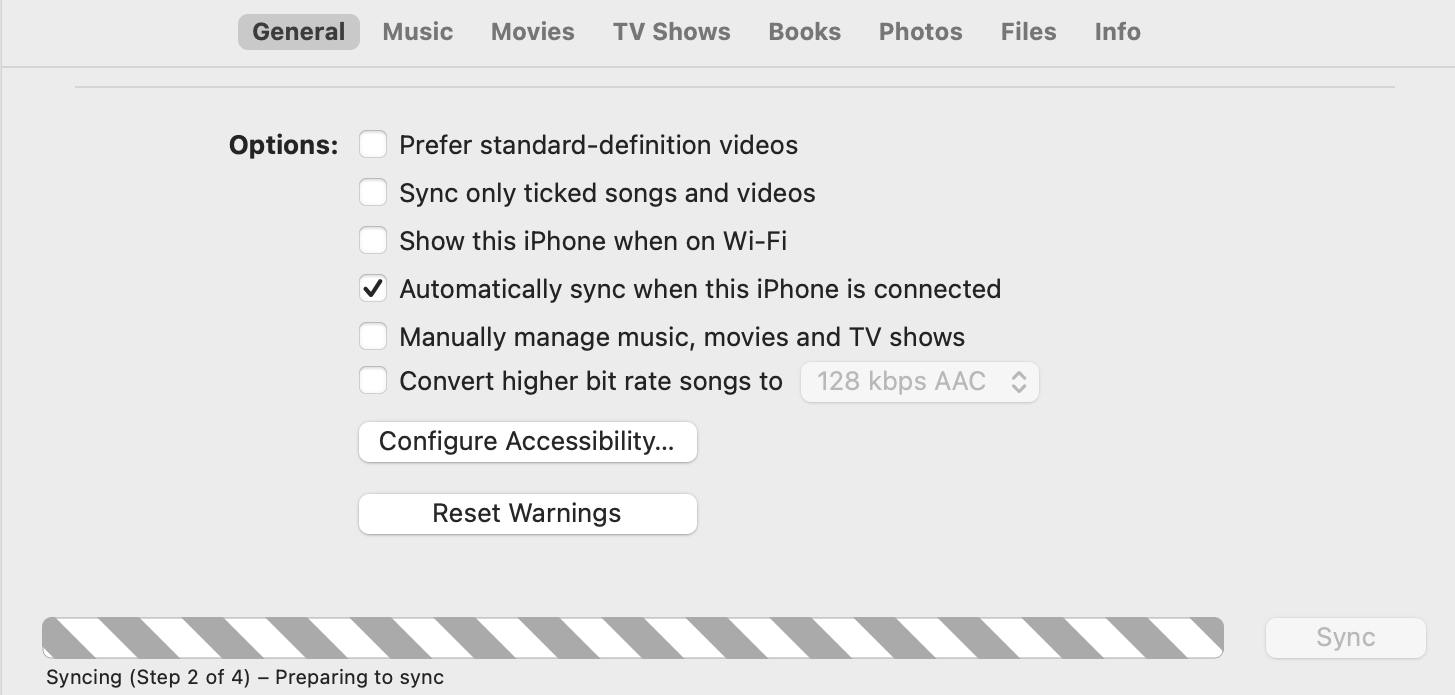
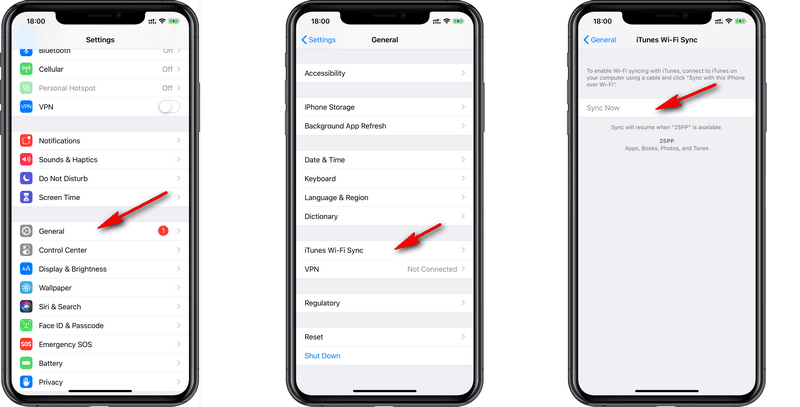
- გამორთეთ Wi-Fi სინქრონიზაცია
თუ იყენებთ Wi-Fi სინქრონიზაციას, გამორთეთ ის USB კავშირზე გადასართავად. შეაერთეთ თქვენი iPhone კომპიუტერთან, გახსენით
პარამეტრები
და აირჩიე
გენერალი
, დააწკაპუნეთ
iTunes Wi-Fi სინქრონიზაცია
და მოხსენით მონიშვნა
სინქრონიზაცია ახლა
ვარიანტი მოწყობილობის შეჯამებაში. ეს ცვლილება ხშირად აუმჯობესებს სინქრონიზაციის პროცესის საიმედოობას.
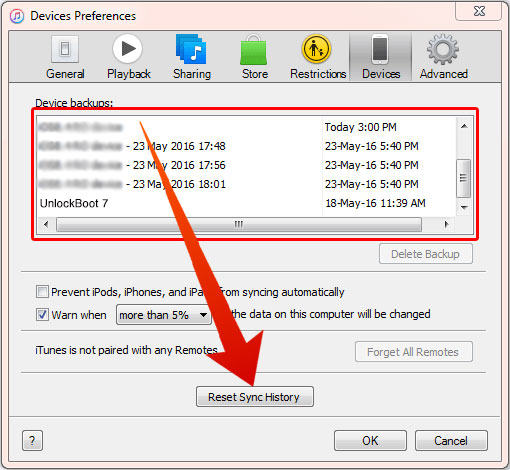
- სინქრონიზაციის ისტორიის გადატვირთვა iTunes-ში
დაზიანებულმა სინქრონიზაციის ისტორიამ შეიძლება გამოიწვიოს სინქრონიზაციის პრობლემები. გაუშვით iTunes ან Finder, გადადით აქ
პრეფერენციები
, აირჩიეთ
მოწყობილობები
და ბოლოს დააწკაპუნეთ
სინქრონიზაციის ისტორიის გადატვირთვა
გადატვირთვისთვის. ეს ქმედება ასუფთავებს სინქრონიზაციის ნებისმიერ პრობლემურ მონაცემს და შეიძლება დაეხმაროს პრობლემის მოგვარებაში.
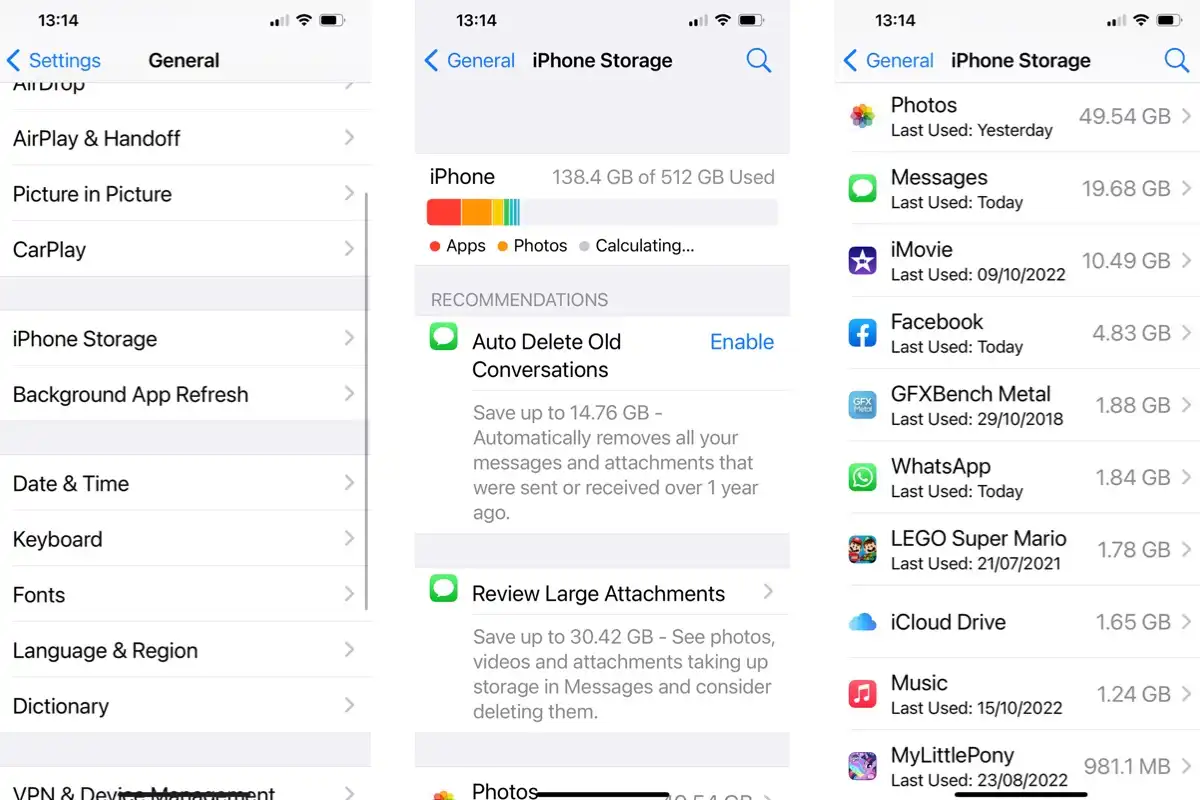
- გაათავისუფლეთ ადგილი თქვენს iPhone-ზე
არასაკმარისმა მეხსიერებამ შეიძლება ხელი შეუშალოს სარეზერვო ასლებს და გამოიწვიოს სინქრონიზაციის შეფერხება. აირჩიეთ
პარამეტრები
>
გენერალი
>
iPhone საცავი
თქვენი iPhone-ის შენახვის ტევადობის შესამოწმებლად. სივრცის გასასუფთავებლად, წაშალეთ ნებისმიერი გამოუყენებელი აპი ან ფაილი და შემდეგ შეამოწმეთ მუშაობს თუ არა სინქრონიზაცია ამჯერად.
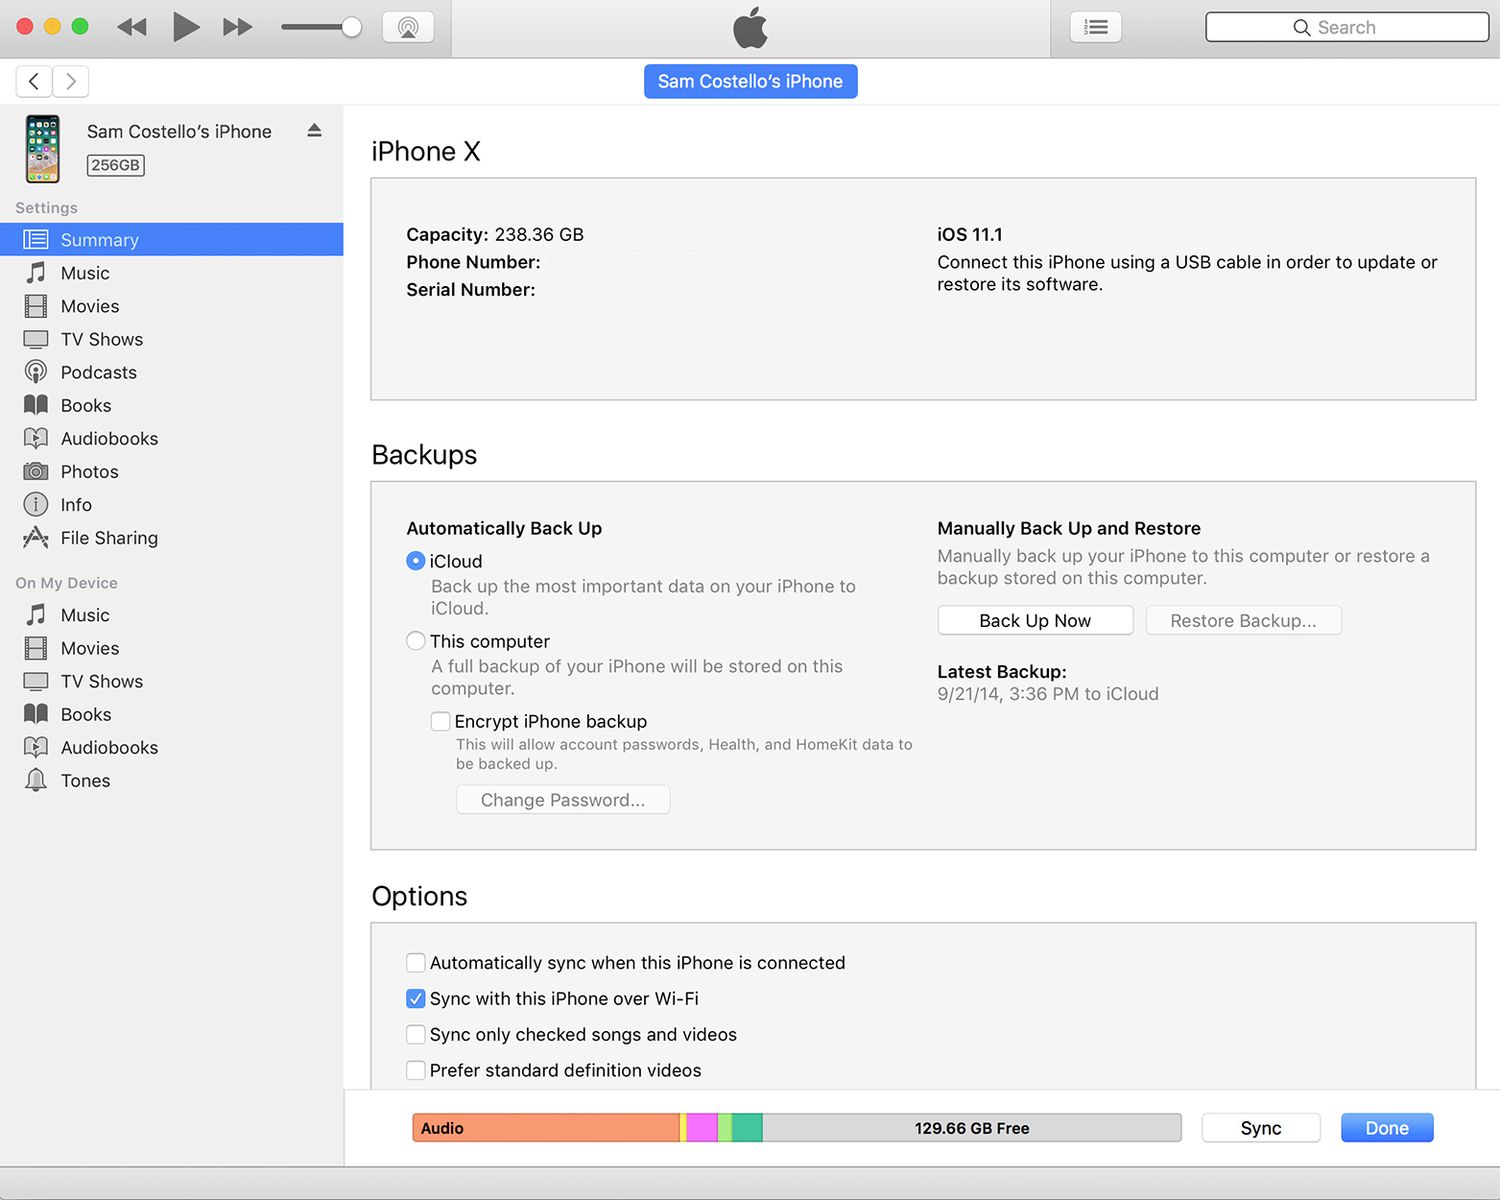
- ნაკლები ერთეულის ერთდროულად სინქრონიზაცია
დიდი მოცულობის მონაცემთა ერთდროულად სინქრონიზაციამ შეიძლება გადალახოს პროცესი. გახსენით iTunes ან Finder, მოხსენით არასაჭირო ელემენტების მონიშვნა და დაასინქრონეთ მცირე პარტიები დატვირთვის შესამცირებლად, რაც ხელს შეუწყობს სინქრონიზაციის პროცესის წარმატებით დასრულებას.
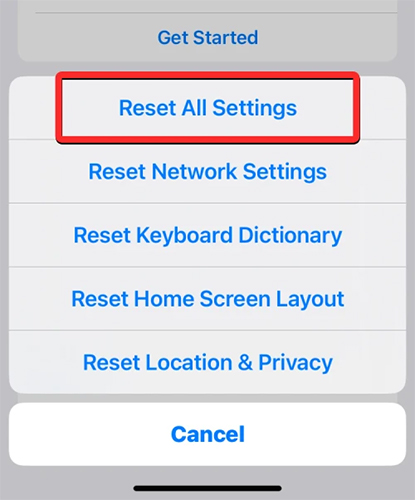
- გადატვირთეთ ყველა პარამეტრი iPhone-ზე
თუ პრობლემა გაგრძელდება, შესაძლოა საჭირო გახდეს თქვენი iPhone-ის გადატვირთვა. ეს პროცესი აღადგენს პარამეტრებს ქარხნულ პარამეტრებზე მონაცემების წაშლის გარეშე. ამის მისაღწევად, მიჰყევით ამ ნაბიჯებს: გადადით
პარამეტრები
>
გენერალი
>
გადატვირთვა
>
ყველა პარამეტრის გადატვირთვა
.
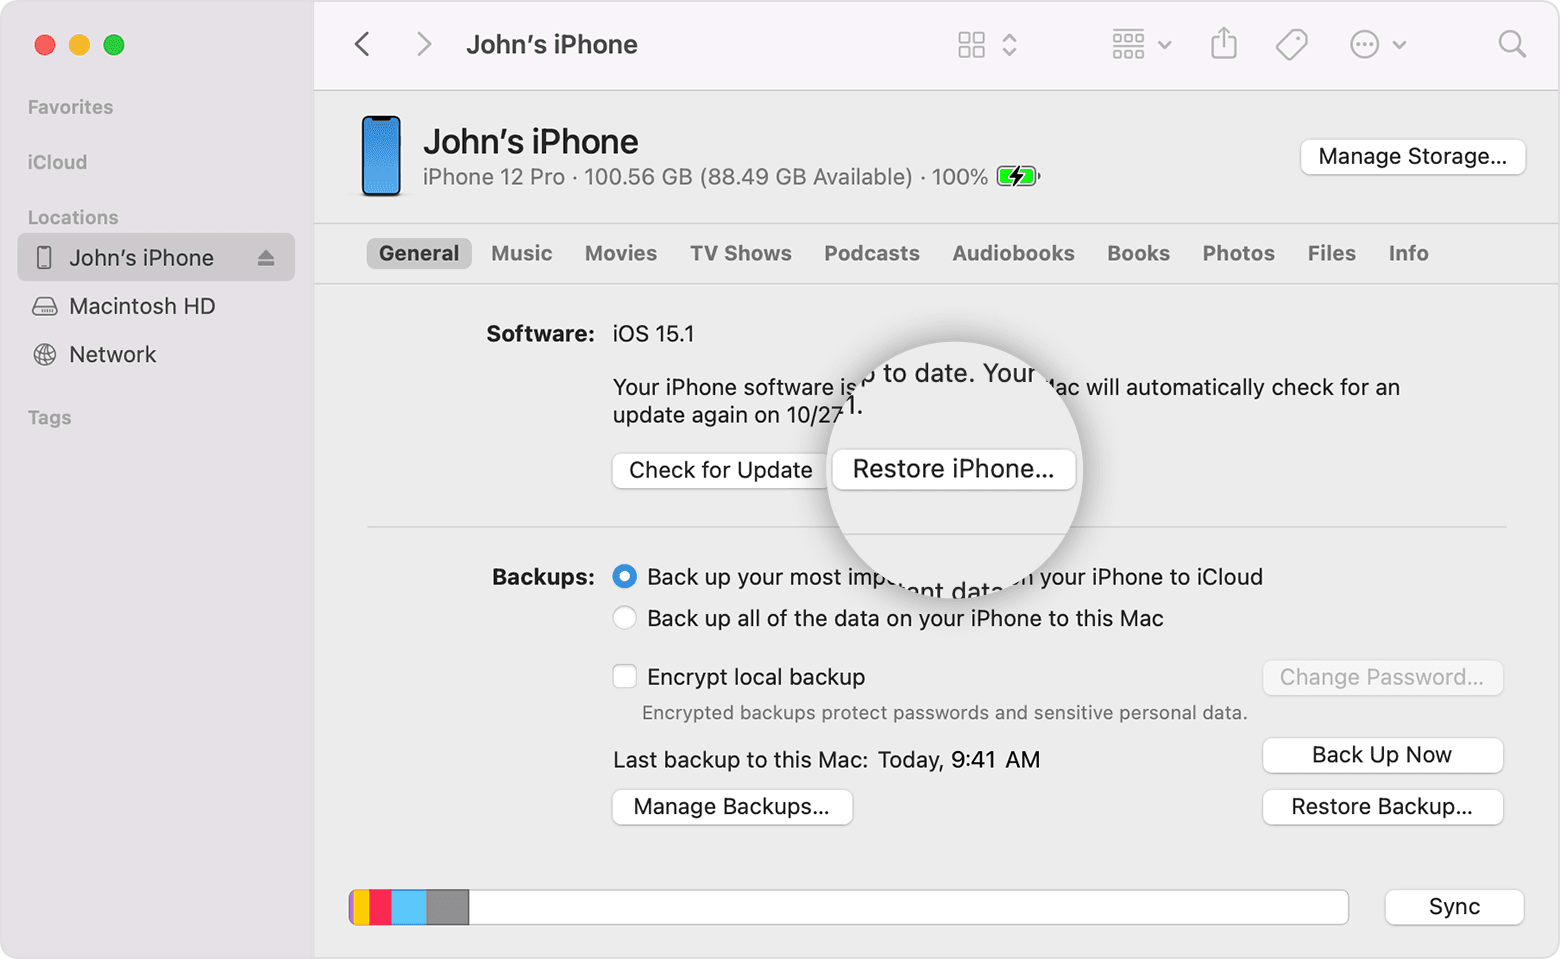
- აღადგინეთ თქვენი iPhone
როგორც ბოლო საშუალება, აღადგინეთ თქვენი iPhone ქარხნულ პარამეტრებში. გააგრძელეთ თქვენი სმარტფონის სარეზერვო ასლი, რადგან ეს ოპერაცია წაშლის ყველა მონაცემს. შეაერთეთ თქვენი iPhone კომპიუტერთან, გახსენით iTunes ან Finder და აირჩიეთ
iPhone-ის აღდგენა
პროცესის დასაწყებად.
3. გაფართოებული გადაჭრა iPhone სისტემის პრობლემები AimerLab FixMate-ით
იმ შემთხვევებში, როდესაც სტანდარტული პრობლემების მოგვარება არ წყვეტს პრობლემას, თქვენს iPhone-ს შეიძლება ჰქონდეს სისტემასთან დაკავშირებული უფრო ღრმა პრობლემები, რაც ხელს უშლის მის სინქრონიზაციას. აიმერლაბი FixMate არის საიმედო ინსტრუმენტი, რომელიც შექმნილია iOS სისტემის პრობლემების ფართო სპექტრის მოსაგვარებლად, მათ შორის სინქრონიზაციის პრობლემების გარეშე, მონაცემთა დაკარგვის გარეშე.
აქ მოცემულია ნაბიჯები, რომლებიც შეგიძლიათ მიჰყვეთ FixMate–ით მე-2 ნაბიჯზე ჩარჩენილი iPhone სინქრონიზაციის გამოსასწორებლად:Ნაბიჯი 1 : აირჩიეთ FixMate-ის შესაბამისი ვერსია თქვენი ოპერაციული სისტემისთვის (Windows) და დააჭირეთ ჩამოტვირთვის ღილაკს, შემდეგ დააინსტალირეთ.
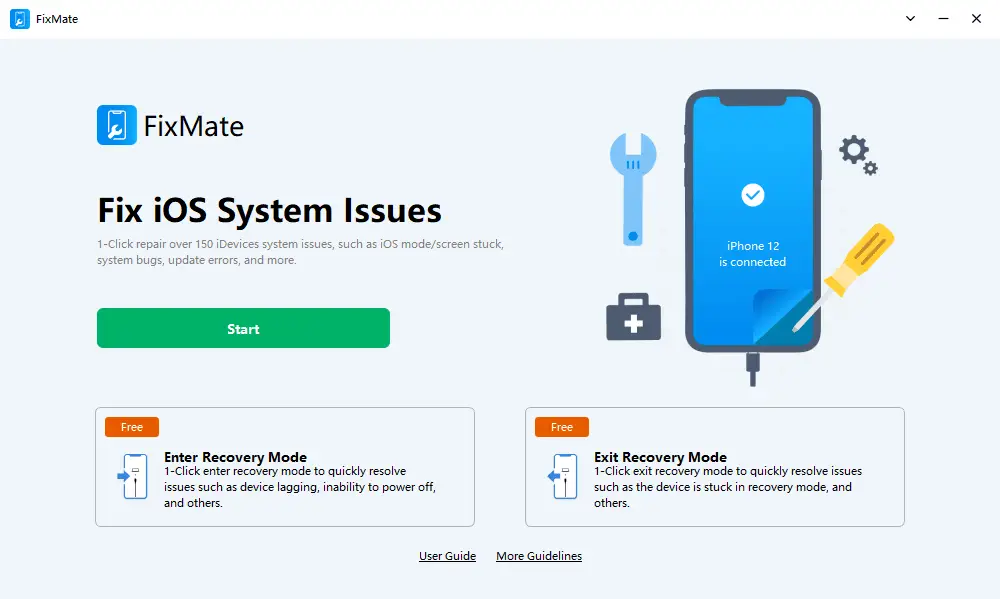
ნაბიჯი 2 : გაუშვით FixMate და დაუკავშირეთ თქვენი iPhone კომპიუტერს საიმედო USB კაბელის გამოყენებით, შემდეგ დააწკაპუნეთ " დაწყება ”ღილაკი მთავარ ინტერფეისზე.
ნაბიჯი 3 : აირჩიეთ “ სტანდარტული რემონტი ” რეჟიმი, რომელიც შექმნილია iOS-ის საერთო პრობლემების გადასაჭრელად მონაცემთა დაკარგვის გარეშე.
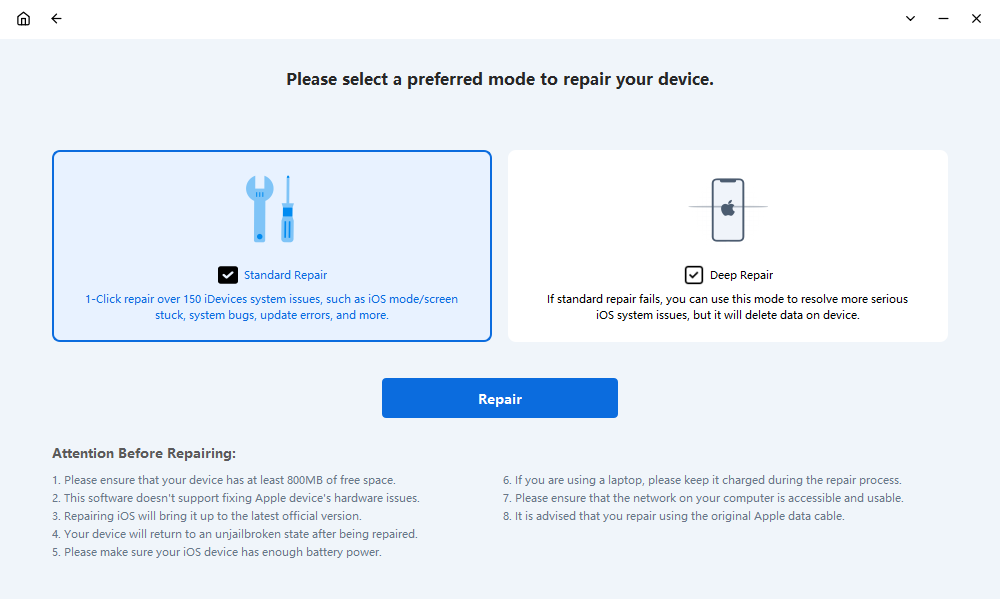
ნაბიჯი 4 : FixMate მოგთხოვთ მიიღოთ შესაბამისი firmware თქვენი iPhone-ისთვის. უბრალოდ აირჩიეთ " შეკეთება ” FixMate-ის ავტომატური პროგრამული უზრუნველყოფის ჩამოტვირთვის დასაწყებად.
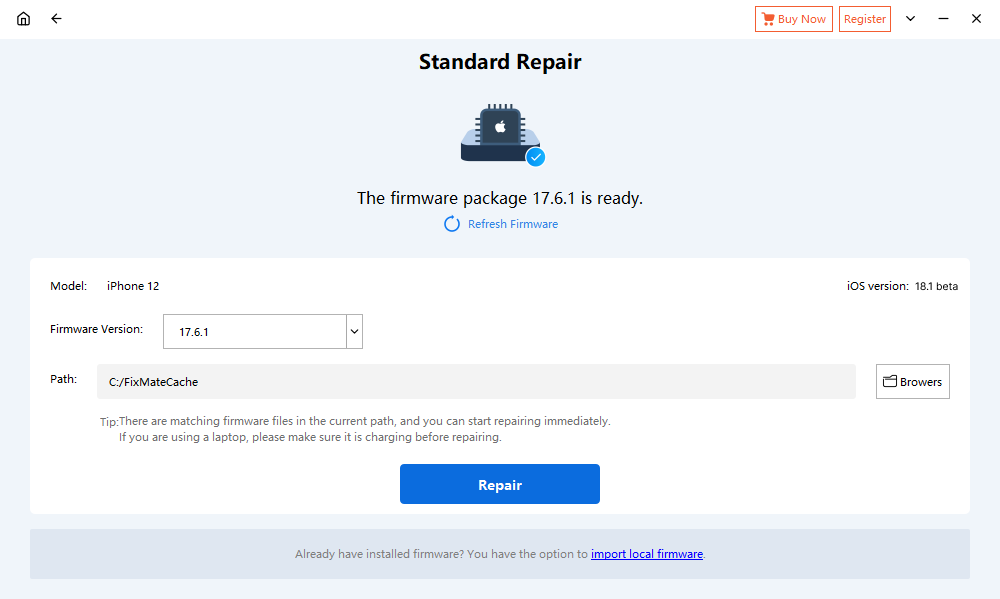
ნაბიჯი 5 : პროგრამული უზრუნველყოფის ჩამოტვირთვის შემდეგ დააჭირეთ ღილაკს ” დაიწყეთ რემონტი ” ღილაკით, რომ დაიწყოთ თქვენი iPhone სინქრონიზაციის პრობლემის გამოსწორება.
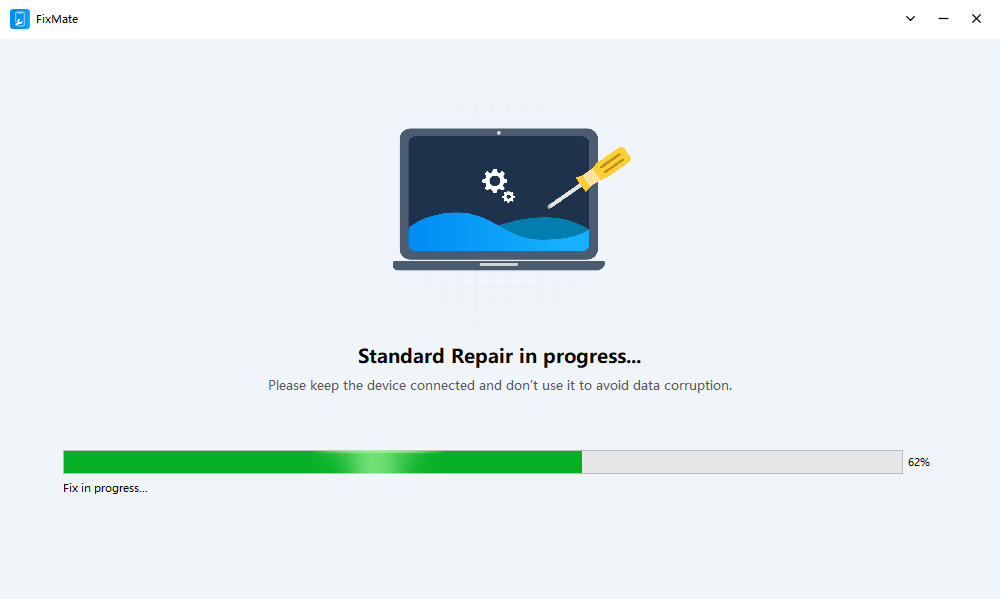
ნაბიჯი 6
: შეკეთების დასრულების შემდეგ, თქვენი iPhone გადაიტვირთება, ხელახლა სცადეთ მისი სინქრონიზაცია iTunes-თან ან Finder-თან, რათა ნახოთ პრობლემა მოგვარებულია თუ არა.

4. დასკვნა
თუ თქვენი iPhone ჩარჩენილია სინქრონიზაციის მე-2 საფეხურზე, შეგიძლიათ სცადოთ რამდენიმე გამოსწორება, თქვენი USB კავშირის შემოწმებიდან პროგრამული უზრუნველყოფის განახლებამდე და სივრცის გათავისუფლებამდე. თუმცა, როდესაც ძირითადი პრობლემების მოგვარება არ წყვეტს პრობლემას, ინსტრუმენტები, როგორიცაა
აიმერლაბი
FixMate
გთავაზობთ უფრო მოწინავე გადაწყვეტას iPhone სისტემის პრობლემების გადასაჭრელად მონაცემთა დაკარგვის რისკის გარეშე. მისი მოსახერხებელი ინტერფეისით და ეფექტური შეკეთების შესაძლებლობებით, FixMate არის რეკომენდირებული გადაწყვეტა ყველასთვის, ვისაც აქვს iPhone სინქრონიზაციის მუდმივი პრობლემები.
- როგორ გავასწოროთ iPhone-ის კამერის მუშაობის შეწყვეტის პრობლემა?
- iPhone-ის „სერვერის იდენტურობის დადასტურება შეუძლებელია“ პრობლემის გადასაჭრელად საუკეთესო გადაწყვეტილებები
- [გამოსწორებულია] iPhone-ის ეკრანი იყინება და შეხებაზე არ რეაგირებს
- როგორ მოვაგვაროთ iPhone-ის აღდგენის შეუძლებლობის შეცდომა 10?
- როგორ მოვაგვაროთ iPhone 15-ის Bootloop-ის შეცდომა 68?
- როგორ გამოვასწოროთ ახალი iPhone-ის აღდგენა iCloud-ის შეცდომიდან?
- როგორ გავაფუჭოთ Pokemon Go iPhone-ზე?
- Aimerlab MobiGo GPS მდებარეობის სპოფერის მიმოხილვა
- როგორ შევცვალოთ მდებარეობა თქვენს iPhone-ზე?
- ტოპ 5 ყალბი GPS მდებარეობის სუფერი iOS-ისთვის
- GPS მდებარეობის მაძიებლის განმარტება და სუფერის შემოთავაზება
- როგორ შეცვალოთ თქვენი მდებარეობა Snapchat-ზე
- როგორ მოვძებნოთ/გააზიაროთ/დამამალოთ მდებარეობა iOS მოწყობილობებზე?